Making-of: group_inou - EYE
Video
Below is a quick technical note.
How to Make?
The basic idea of this video is to combine the Street View screenshots with the stop-motion animation of the artist of the video, group_inou. To make this technique possible, it was essential to build efficient methods of retrieving background panoramas from Street View and shooting pictures of members.
Here is a basic workflow.
- Location Hunting: Write down good locations on spreadsheet.
- Fetching proxy images of Street View and making pre-visualization.
- Shooting.
- Converting images to high-res and compositing with characters.
Below is a set of tools I had built in the making process -- though a large part of their codes is messed up.
license type='mit' href='https://github.com/baku89/group\_inou-EYE'baku89/group_inou-EYE : GitHub/license
Hyperlapse.js
To get images from StreetView, I forked Hyperlapse.js, which is an open-source library from teehan+lax.
I ended up barely using Hyperlapse.js itself but mainly used a library called GSVPano.js, on which Hyperlapse.js depended. An original repository was deleted by violating the Term of Service (ToS), so I used the modified version in Hyperlapse.js. The official blog of teehan+lax said they rewrote the part of the code which downloads panorama-tiled images to use official API methods not to conflict with ToS.
Fetching Panorama
Hyperlapse.js automatically searches routes between two points with Google Map API, subdivides the route into a series of points, and finds the nearest Street View. It means Hyperlapse.js cannot go out-of-way places, like inside buildings or elevated railroads, so I built a tool to collect adjacent Street View IDs from a given initial point.
GSVPano.js loads the JSON array of panorama ID and downloads each panorama image.
toDataURL() converts the panorama image drawn on canvas into base64, and “fs.saveFile()“ in Node.js saves them into local. I used NW.js to enable Node.js functions to be called from the browser.
Embedding Data in Panorama Images
Below is edited panorama images.
A red and green dots on the bottom edge of this video are the saved Panorama data.
{
    "id": "WysqsRo6h5YGNmkkXVa9ZA",
    "rotation": 35.11,
    "pitch": 1.09,
    "latLng": {
        "A": 51.59035,
        "F": 3.677251999999953
    },
    "date": "2009-09",
    "heading": 0
}
This JSON is converted into byte arrays and writes each bit on the bottom of the video. (corresponding code)
The reason for going through this process was to replace it with high-res images later. The dimension of the sky map image needed for rendering 1080p is at least 10Kpx, but it could cause some trouble if I kept downloading too many of such large images, so I got 1600px-wide good-looking images for that time. I built a proxy-replacing tool for that.
Making Pre-visualization
A detailed previz was required at the pre-production stage because shooting could be very tough otherwise. I brought edited panorama images into Cinema4D and added camera motion. Fortunately, there were low-poly models of both characters from another project, so it was easy to set the motion of members.
Shooting
EOS 5D Mark2 was used for shooting. For realistic lighting and perspective, the idea of taking images of many general poses to use them repeatedly was not good enough. So I decided to shoot from beginning to end in turn.
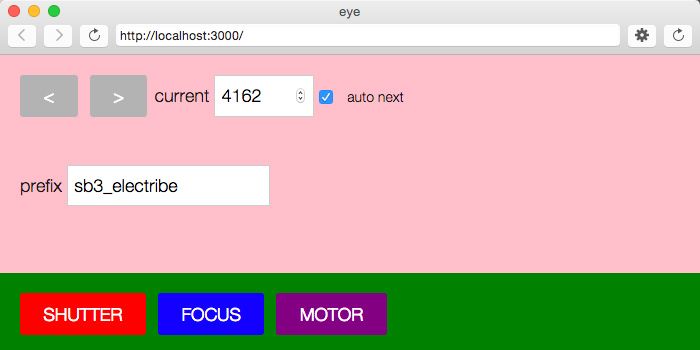
It turned out to be around 3,000 frames to shoot. Strong automation was required, so I built a shooting system with NW.js.
Controlling lights with DMX
I used DMX, a protocol generally used for controlling stage lights, to control lights. ENTTEC DMX USB PRO was used to send DMX signals. It was tough to install the driver into mac with OS after Mavericks because of some known bugs.
DMX is mainly used for stage lighting, most of which has XLR inputs to receive the DMX signals, but there is no such as photographic lighting. An alternative was ELATION DP-415 to control input voltage directly.
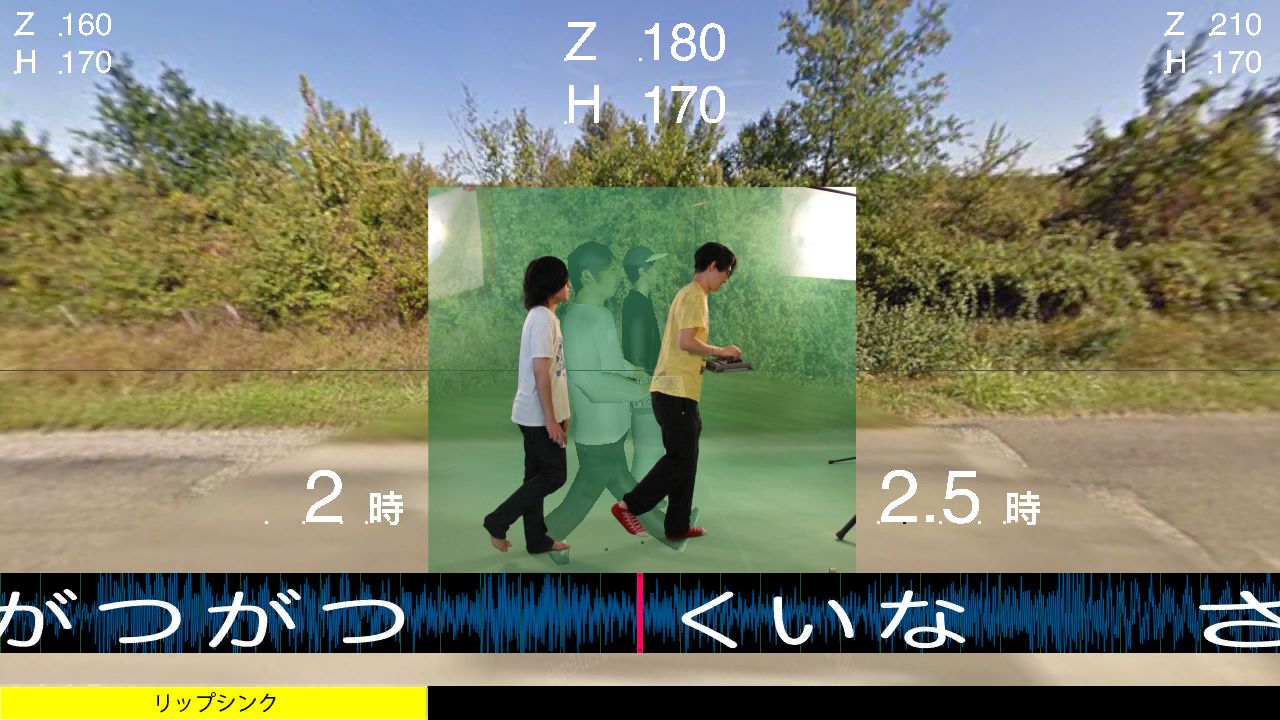
Calculating Camera Position and Adjusting Direction of Characters
I added Xpresso in Cinema4D project to calculate camera position. Time direction was used to set the direction of members. Distance from members is written on floors, and scale was written on tripod feet to make the angle more accurate. Plates with each time were around them. A video guide was set above them so they could see the direction to turn next.
DIY Release and Electric Follow-focus with Arduino
I also built PC control for the shutter and zoom ring with Arduino since the camera position is quite high.
(btw I found there were official Canon SDK and add-ons for oF after everything was done.)
I used a stepper motor to drive the follow-focus. It was a little risky because it did not recognize the end of the rotation of the zoom ring, but there was no time to fix that problem. It looks kinda ugly, but it somehow worked.
Extending Cinema4D with Python
Cinema 4D uses python as a scripting language. This means OSC/DMX libraries also run on Cinema4D. I used python-osc to synchronize the timecode between the apps and pySimpleDMX to control lighting.
Use of VDMX
A large video guide was projected using VDMX. This helped members to image their motion.
Actual Shooting

It turned out to be a system like the above. Pink arrows indicate OSC. With this system, we could finish taking nearly 3,500 frames in two days.
Test shooting
Post Production
All sources were edited with AfterEffects. The background was replaced with a high-res version. Because of too fast movement, AE's Warp Stabilizer did not work well, so we manually stabilized the Street View backgrounds frame-by-frame.
If you have further questions, please feel free to mention @_baku89.
Special thanks to Nolie-san for translating.